Slow Decorating: Creating the Home of your Dreams over a Lifetime
When the cover on one of our sofa cushions tore last year, we knew we’d have to do something. Would that be a slipcover? Reupholstery? Just recover the cushions? A totally new couch? How could we introduce new fabric or such a large piece of furniture into our existing living room without having to totally redecorate? Which approach is the best approach for us and for the planet?
To place the choices of reupholstering or replacing our couch in context, our living room has always been incrementally evolving as we find new things or need to solve new problems, like the torn cushion. In the last five years alone, we’ve added a new rug, replaced our drapes (twice!) and coffee table (twice!), and we have an ever changing repertoire of throw pillows and accent chairs. We’ve reupholstered a wing chair, footstool, and several side chairs, and tweaked the floorplan several times.
Recently, our incremental approach to decorating has gained a name: slow decorating. Slow decorating, like slow fashion, is a more sustainable approach to design, one in which your home evolves over time and may never be finished. It’s a focus on solid construction and lasting design, while ignoring trends and resisting overconsumption. And, to be fair, I think it’s how most people live.
Whenever I need to change a major element in a room, like a sofa, or I need to shift the purpose and entire look of a room, I like to start by thinking about how I want the room to function, which feelings I need it to inspire, and what stories I want it to tell. But for me, feeling and function are disrupted when it seems like the elements in a room are fighting each other. I need a plan to fall back on, a strategy which helps me define what I am looking for whenever I add something new. I’ve learned the hard way that I need to make sure before I start that any new choice will fit in and enhance the existing room, rather than initiating a domino effect of replacements and rejects. And, before I shop the stores, I shop the house. Do I already have some fabric I can use – like some old curtains or leftover upholstery fabric? Have I banished something to the basement which would solve this problem? Is there something causing me anxiety in a different room which could fix things in this room – can I kill two birds with one stone?
Whether you are creating a room within an empty shell, tweaking an existing plan, or anywhere in between, a mood board is the best tool to help you visualize the direction you want the room to take. It can be created in or on a table top, tray, bulletin board, file folder, Pinterest board, Word document, etc., and will become the physical representation of your decorating strategy. It will let you see how the things you like work together and help you remember what you’ve chosen (and what you’ve rejected). With a mood board you can test whether your choices serve the purpose of the room while creating the feeling and aesthetic you are aiming for. As you play around with palette and texture, you can refine the sensibility you will draw upon to build the room. You can establish rhythms and tensions through balance, symmetry, and contrast, and begin thinking about which features will anchor your room, and which will bring it to life.
Start with some of the largest areas which could be covered in patterns, textures, and colors. In most rooms, that will be the walls, ceilings, and floors, the windows, and the largest pieces of furniture – beds, sofas, dining tables, cabinets, etc. Any of those large areas could be where you begin collecting images and ideas. Perhaps you’ve had your eyes on a particular rug for a while and you t it would think it could totally deliver the function and feelings you want for the room. Try it out on your mood board, and experiment with other pieces which might coordinate before you make any purchases, After developing a mood board, especially if you are building a room from scratch, try to sketch out floorplans and wall elevations, perhaps even full-blown renderings, so you can begin to not only visualize the new room, but conceptualize how it flows and functions. You can create these on paper or mock up your lay out in the empty room using cardboard boxes and blue tape.
When you are first starting to decorate, translating your mood board, sketches, layouts, and visions into a completely furnished room can be daunting, Acquiring all the furniture, fabrics, and fixtures you dream about can be costly in both time and money, especially if you want your room to be functional and beautiful from the start. So it will be tempting to use easily acquired and inexpensive placeholders. We encourage you to search for those placeholders in thrift stores and at garage sales, rather than stocking up on particle board furniture and cabinetry from a big box store. Solidly constructed thrifted pieces will be easier to reuse, donate, or resell in the years to come when you ultimately find just the thing you’ve been dreaming of. Unlike particle board, a solid wood piece is unlikely to dent or even fail before that dream piece comes along. Having real furniture in your home from the start, even if its not the perfect collection you dream of, gets you on the road to slow decorating.
My version of a mood board is a collection of small fabric swatches and paint chips representing what we’ve used all over the house. I keep these in a small box in my office, and because I am always moving stuff around the house, I don’t segregate the samples by room. When I am working on a specific room, I can quickly turn to the box and assemble a pile of fabric and paint chips to take with me when I shop. It’s also handy when shopping the house, as I can sample how things work together before I start lugging around large pieces of furniture.

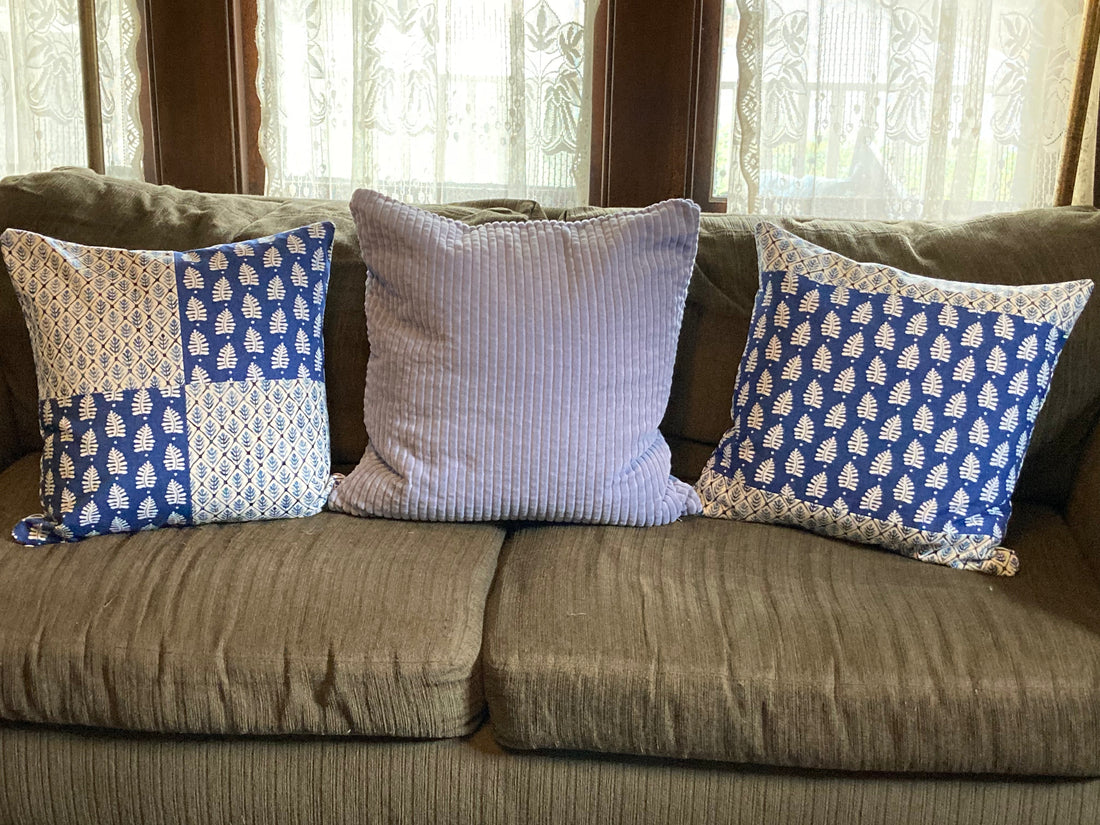
So what did we ultimately do about our torn couch cushions? I bought a subtle grey and lavender upholstery fabric remnant which I knew would serve well since I was able to test it in the store against the living room fabric samples that I took with me. There were only four yards remaining on the bolt, just enough to make new cushion covers, so I left the original upholstery on the sofa structure. Originally our sofa had attached back cushions which I always hated. So, after removing the back cushions, I patched the holes they left with the original upholstery removed from one of the cushions I had just recovered. I reused the zippers from the old cushion covers in the new covers. Finally, I stored one set of pieces from the old cushion covers to use as pattern pieces in the event we decide to totally reupholster or slip cover the sofa in the future, and want a unified fabric over the entire piece.

Just like I’ve done with parts of the old sofa cushions, we’ve repurposed much of the other things from earlier iterations of our living room, like the old curtains and coffee tables. A set of curtains became pillow covers and a door portiere in the dining room. Our newest coffee table is in fact a repurposed and reupholstered toy box we’d had in the basement for many years; one of the earlier coffee tables found a home in our office/guest room, and the other moved to our basement “severe weather lounge.” Most of our personal particle board mistakes have found new purpose in the garage. If something is still in really good shape and has solid construction, but it’s just not going to work for us ever again, we’ll donate it to Goodwill or Habitat ReStore. And some things we just take to the curb, where they always seem to disappear within hours. When I reupholster furniture, I take things apart slowly so I can inspect the piece for what can be reused. Sometimes I may need to replace the outer fabric, but the underlying foam and padding is just fine and I can reuse it when I put the piece back together. Some of the upholstery fabric I’ve removed has found a new home on another piece, while some of it has simply become stuffing in a pouffe or pillow (also the ultimate destination of many of our tiny fabric scraps). However, I’m sorry to say, when the upholstery has mysterious or unpleasant stains or odors, I throw it out. I simply haven’t found a way to reuse that kind of thing yet.
Finally, now, just a year after sewing those new cushion covers, we’ve got a new shelter dog who likes to chew, so we’ve covered the couch with an old quilt. Which just happens to be close to the same color as the original upholstery.
